Shop Tips and Tricks
- Thread starter geezer
- Start date
whoever
Anonymous new guy
WOW! thank you Glen , CA is the new Duct TapeMade this couple of years ago never uploaded it until today for you hehehe
So simple So easy

whoever
Anonymous new guy
nice, what about using rare earth magnets to hold the razors? I always thought I would brake them in two using a jig like that.MAG JIG/ Holder
This is a home made and long serving magnetic jig to hold razors for working on them.
The idea has been around a long time! The aluminum area soaks out heat pretty well and does not affect the magnetic flux.I just added two deep saw slots to make spine and tang work easier.
View attachment 88
Deep enough for an FBU slots:
View attachment 89
Next time I get some "Corian" counter-top leftovers, I will make one that is washable!!
No special reason to make one exactly like this...you are going to be working with it and so can do your own design...Have Fun !!!
~Richard
geezer
Member
Re: jignice, what about using rare earth magnets to hold the razors? I always thought I would brake them in two using a jig like that.
Under the aluminum there are three large rare earth magnets. The slots do not have magnets, though they could. I hold the jig in my hand with a thumb over the spine when the blade is in the slot. The magnets hold the blade well in the aluminium angled part.
Everyone to their own way of working and enjoying the hobby.
~Richard
whoever
Anonymous new guy
wouldn't any pressure on (even more rare than the rare earth magnets) , the razor, cause it to bend while in the slots being sanded?Re: jig
Under the aluminum there are three large rare earth magnets. The slots do not have magnets, though they could. I hold the jig in my hand with a thumb over the spine when the blade is in the slot. The magnets hold the blade well in the aluminium angled part.
Everyone to their own way of working and enjoying the hobby.
~Richard
wouldn't rare earth magnets in a piece of wood without slots be better to hold the blade in place with less chance for damage?
geezer
Member
FWWOriginally Posted by randydance062449
I hope that someone who has actually used these bits posts the info into the "workshop" forum.
Hint, hint ......
answer to an earlier post with a recommendation:
I believe the # size of that drill to be wrong. A #9 is about 0.196 diameter and bigger than 3/16ths.
Here is a chart to find the correct diameters of drill bits for your purpose. Larger the # smaller the drill bit diameter.
drill-size-chart
I would guess the correct diameters to be #51 or #52 about 1/16th" and a bit larger.
Split points are a great improvement over regular bits for our works.
A screw machine length drill bit has shorter flutes and is less apt to bend while drilling.
Thanks for mentioning this."" Oops ... my second oversight ....
"Set the speed of the drill press as low as possible" is one other requirement that Sharpton has for drilling out the razors pins.
~Richard
geezer
Member
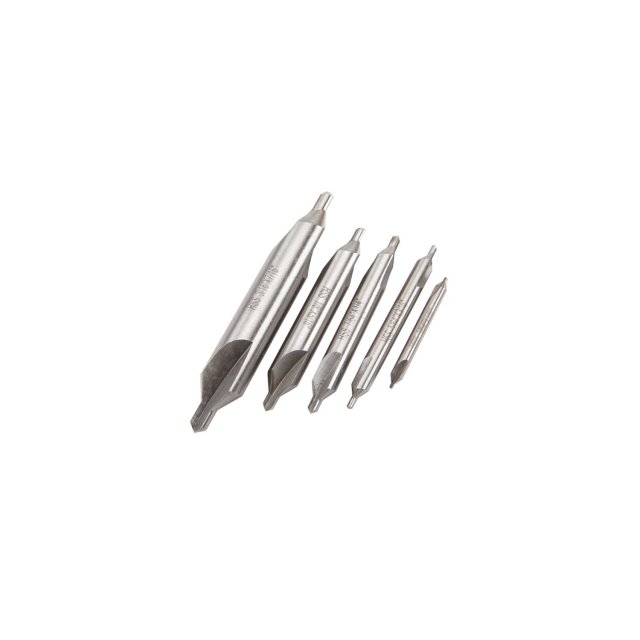
Center drills
Ok, More info. Some folks, me included, often use a small center drill to start and sometimes finish a pin drill out.
the tip, small diameter should be less than 1.7mm or 1/16th inch, usually that will make a 3/16th dia shank.
Run slowly in a machine and they can do a great job of removing the pin thought washer. Or, to start a hole to drill out later with a correct size drill bit.
Gasman
Show me that again!
I have a set of these. They work really well. I find using them to drill out pins even better than the split point bits. I use the split points to drill new holes in scales as they dont wander and i get a cleaner hole.
I find with the center drillswhen the collar catches on the bit, the pin is drilled just enough to pull the scales apart. Works really well.
I find with the center drillswhen the collar catches on the bit, the pin is drilled just enough to pull the scales apart. Works really well.
Yes. depending on the size I need, I either drill 1 hole, or I drill 2 and then remove the material in between.
With material like this it's not always easy to keep the holes straight btw, because if you get to a section that is porous on one side, the drill tends to take the easy road.
With material like this it's not always easy to keep the holes straight btw, because if you get to a section that is porous on one side, the drill tends to take the easy road.
32t
Active Member
I had a teacher one time that at the end of a lecture told us,
"Tomorrow you will remember 80% of what I say, the next day 60%.
After a couple of months you will remember 5%.
Make sure in that 5% is where to look up the answers!"
Of course as I right this I think that this is before you could ask you refrigerator the distance to Memphis.
"Tomorrow you will remember 80% of what I say, the next day 60%.
After a couple of months you will remember 5%.
Make sure in that 5% is where to look up the answers!"
Of course as I right this I think that this is before you could ask you refrigerator the distance to Memphis.
Yeah a lot of what we had to learn in our day doesn't make sense anymore. At least for those classes where you had to cram knowledge.
I remember the futility of learning everything about the Eastern block and the soviet union, the year each of them disappeared. Our exams were about stuff that already didn't exist anymore.
I remember the futility of learning everything about the Eastern block and the soviet union, the year each of them disappeared. Our exams were about stuff that already didn't exist anymore.
32t
Active Member
It irritates me when people state that without reservation "this" is the answer.
I think that a better statement would be to the best of my/our knowledge at this time this is the answer.
We are always, or at least should be learning.
We all know that the answer to life the universe and everything is 42. Right?
I think that a better statement would be to the best of my/our knowledge at this time this is the answer.
We are always, or at least should be learning.
We all know that the answer to life the universe and everything is 42. Right?
Not really blade making but home renovation. I made steel anchors for supporting those concrete tiles as i glue them to the wall. The bottom ones needed to be supported from above.
I suck at welding but even bad welding skills can vastly improve your options in a home diy project.

I suck at welding but even bad welding skills can vastly improve your options in a home diy project.